Raspberry Pi GPIO from Python: the parts that go wrong
Reading a button and switching an LED from Python takes ten lines. Getting it to behave reliably for months takes knowing what the hardware does that the code cannot see.
Debouncing
A mechanical switch does not go from open to closed cleanly. The contacts bounce for some milliseconds, and the pin can register several presses. A press handler that counts events will count too many. gpiozero handles it for you if you tell it a bounce time:
from gpiozero import Button
from signal import pause

button = Button(17, bounce_time=0.05)
button.when_pressed = lambda: print("pressed")
pause()
Button also enables the internal pull-up resistor by default, so the pin reads high when open and low when pressed, which is why you wire the button between the pin and ground. A pin left floating without any pull resistor picks up noise and produces phantom presses.
Voltage levels
The GPIO pins of Raspberry Pi boards work at 3.3 V and are not 5 V tolerant. Connecting a 5 V output, from an Arduino or from many sensor modules, directly to an input can damage the pin or the chip. Use a level shifter or a voltage divider. Also remember that each pin can only supply a small current, so drive anything larger than an indicator LED through a transistor or a driver board.
PWM and timing
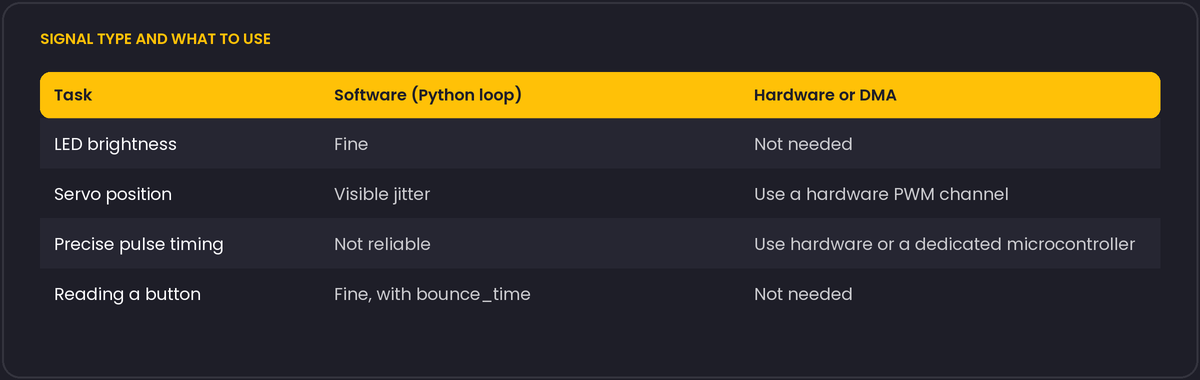
Python on Linux is not a real-time environment. A software-generated PWM signal, produced by toggling a pin from your code, jitters whenever the scheduler runs something else. LEDs will not show it, but servos will twitch. For servos and other timing-sensitive signals, use hardware PWM channels or a library that generates the waveform with DMA, and check which pins support it on your model.
Library support by board
RPi.GPIO has been the default choice for years, but as far as we know it does not work on Raspberry Pi 5, whose I/O runs through a different chip (RP1). The gpiozero library works across boards by choosing a suitable pin factory underneath, and there is a compatibility package, rpi-lgpio, that provides the RPi.GPIO interface on top of lgpio. Library support keeps changing with OS releases, so read the current Raspberry Pi documentation for your board before you install.
Habits that prevent field failures
- Run the program as a service with automatic restart, and release the pins on shutdown (
gpiozerodoes this on normal exit). - Set pins to a safe state at start, so a motor does not spin up while the program initialises.
- Protect inputs from long cables with series resistors and, for noisy environments, an opto-isolator.
- Power supply problems look like software bugs. Random reboots and unstable readings often come from an undersized supply or a bad cable.
Before writing any code: I2C and SPI need enabling
Sensors and displays that talk over I2C or SPI will not respond at all until the corresponding interface is turned on, which is a separate step from wiring the pins correctly. raspi-config (or the Raspberry Pi OS graphical settings) has an "Interfacing Options" section with I2C, SPI and serial toggles, off by default on a fresh install. A device with no response and no error, rather than an exception, is the usual symptom of an interface that is still disabled, so check this before suspecting the wiring or the code.
Once I2C is enabled, i2cdetect -y 1 (from the i2c-tools package) scans the bus and prints the addresses of anything that answers, which confirms both that the interface works and that a device is wired correctly and at the address your code expects, before you write a single line of Python against it. For working out which physical pin is which from Python's point of view, gpiozero's pinout command prints a labelled diagram of the board straight in the terminal, which is faster than looking one up online for an unfamiliar model.